
Setting up Crypto Payments through Nicky
Nicky enables secure crypto payments for individuals, freelancers, and businesses—allowing you to receive cryptocurrency payments directly into your wallet without intermediaries ever holding your funds.
By integrating Nicky with your eCommerce store, you can offer customers the option to pay using supported cryptocurrencies during checkout, while payments are routed straight to your connected wallet or exchange account.
Steps to activate the Nicky crypto payment gateway in your myecommerce.com dashboard
Step 1: Activate Nicky in your ecommerce admin panel
- Log in to your eCommerce admin panel.
- Navigate to the Settings → Payments in your admin panel.
- Click on the “Add payment method” anchor text.
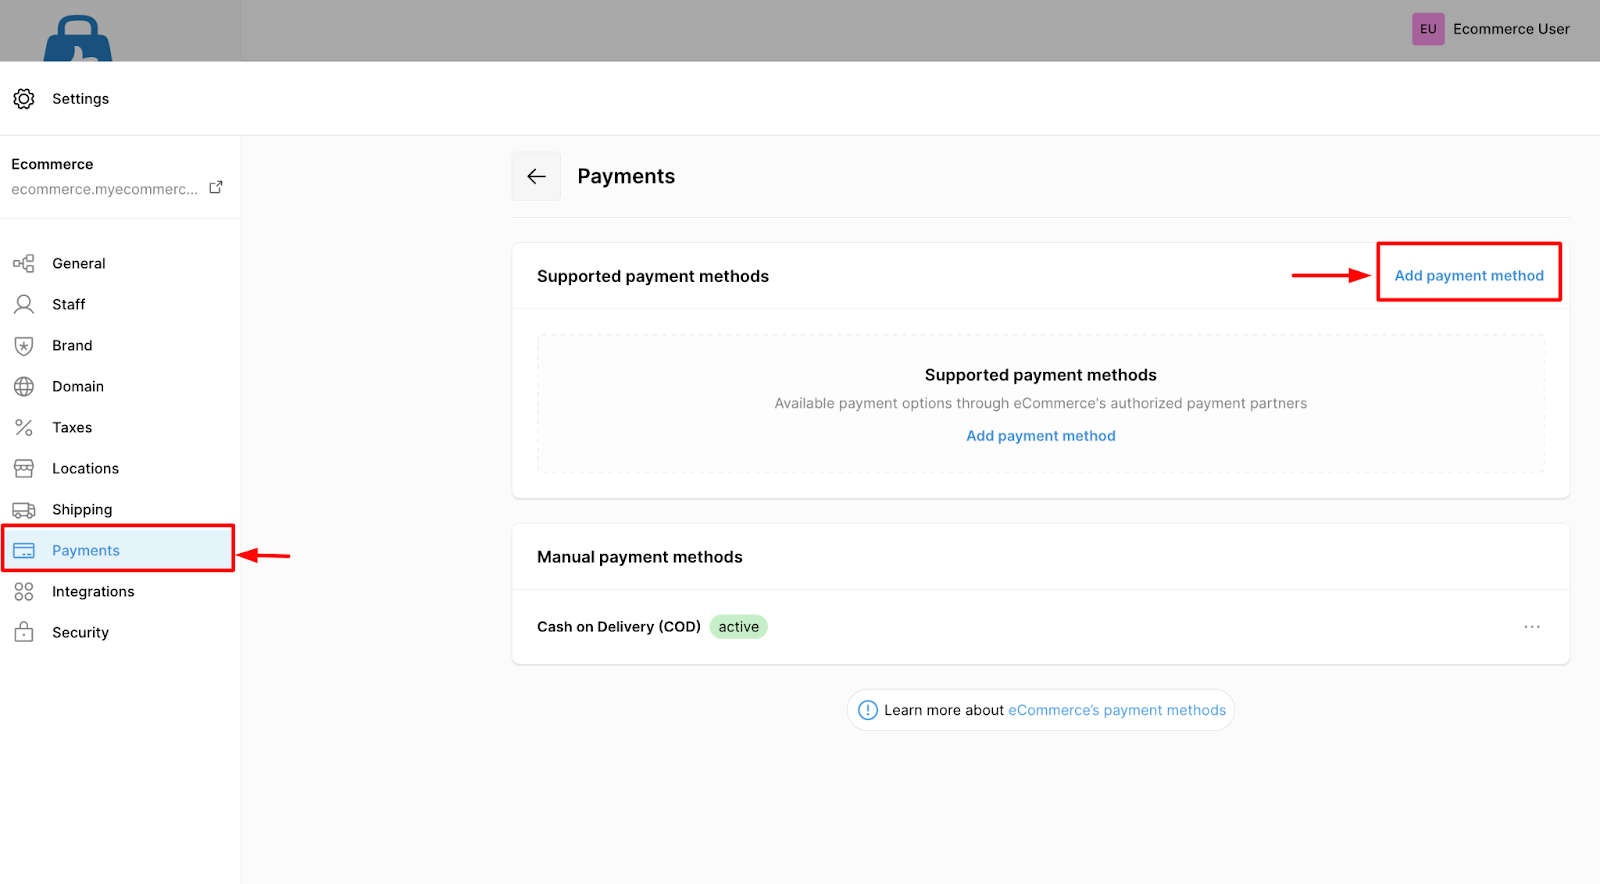
- Payment gateway availability is based on store currency. Only the payment gateways that support your selected store currency will appear as available options for your store.
– If the Nicky payment gateway is available with your store currency then select Crypto Payment Through Nicky.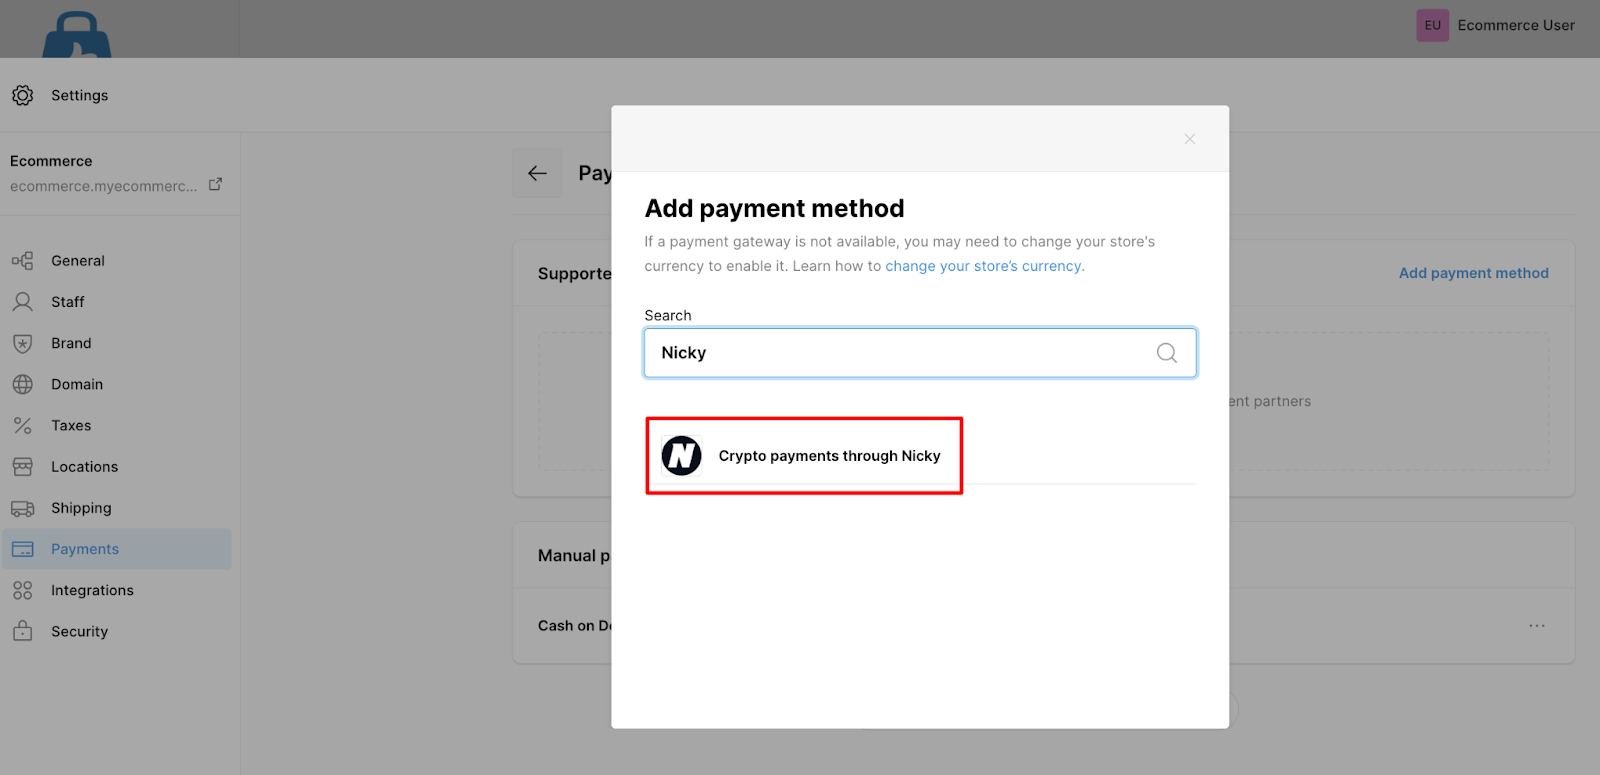
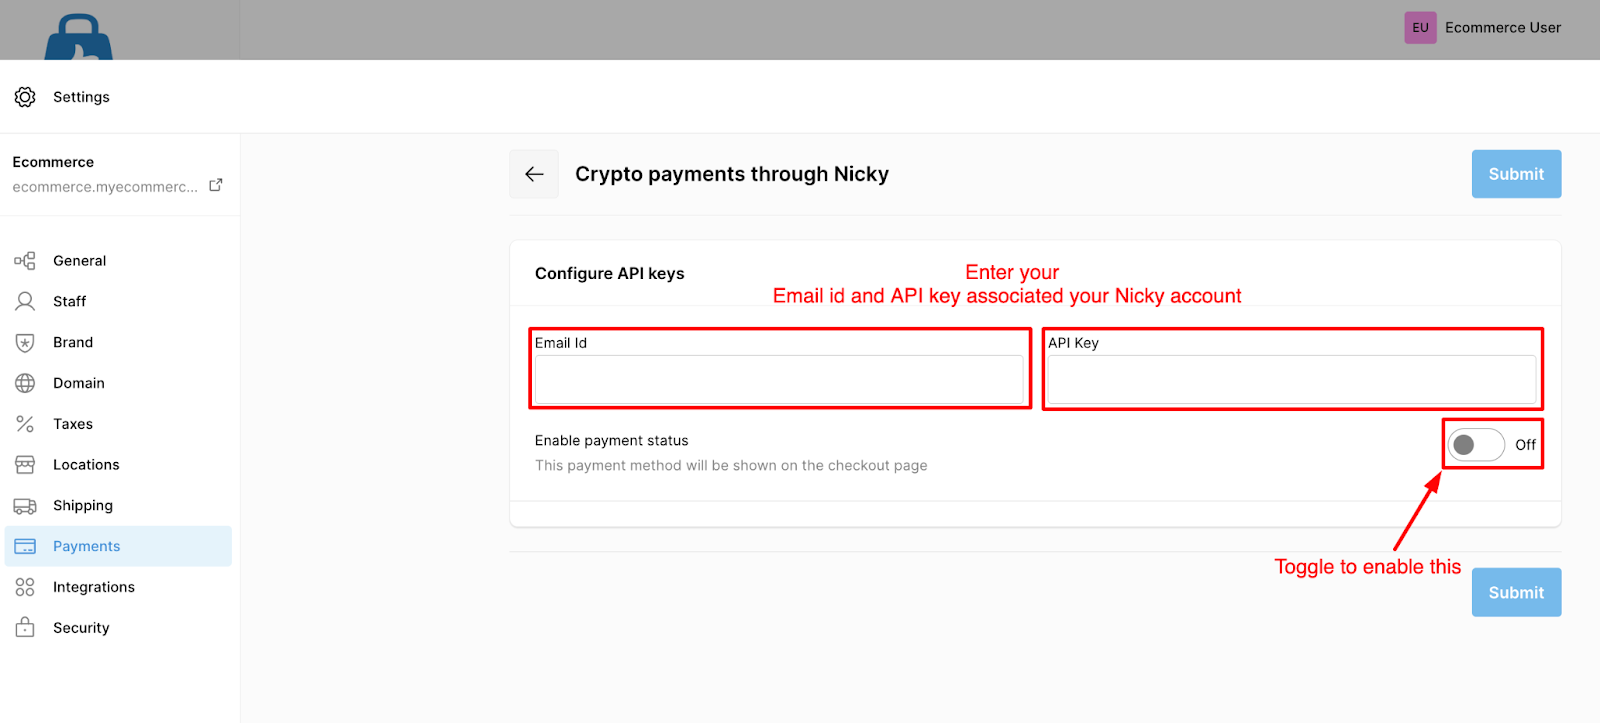
- In the “Enable payment status” section, click on the toggle to enable the payment method.
At this stage, you’ll be asked to provide your Email ID and API key, which you’ll generate in the next step.
Step 2: Generate your Nicky API key
If you don’t already have a Nicky account, create your Nicky account to get your API key for crypto currency transactions.
- Visit “nicky.me” and click on the “Sign up” to register yourself with the payment gateway.
- Complete registration and log in to your dashboard at https://pay.nicky.me.
To generate your API key:
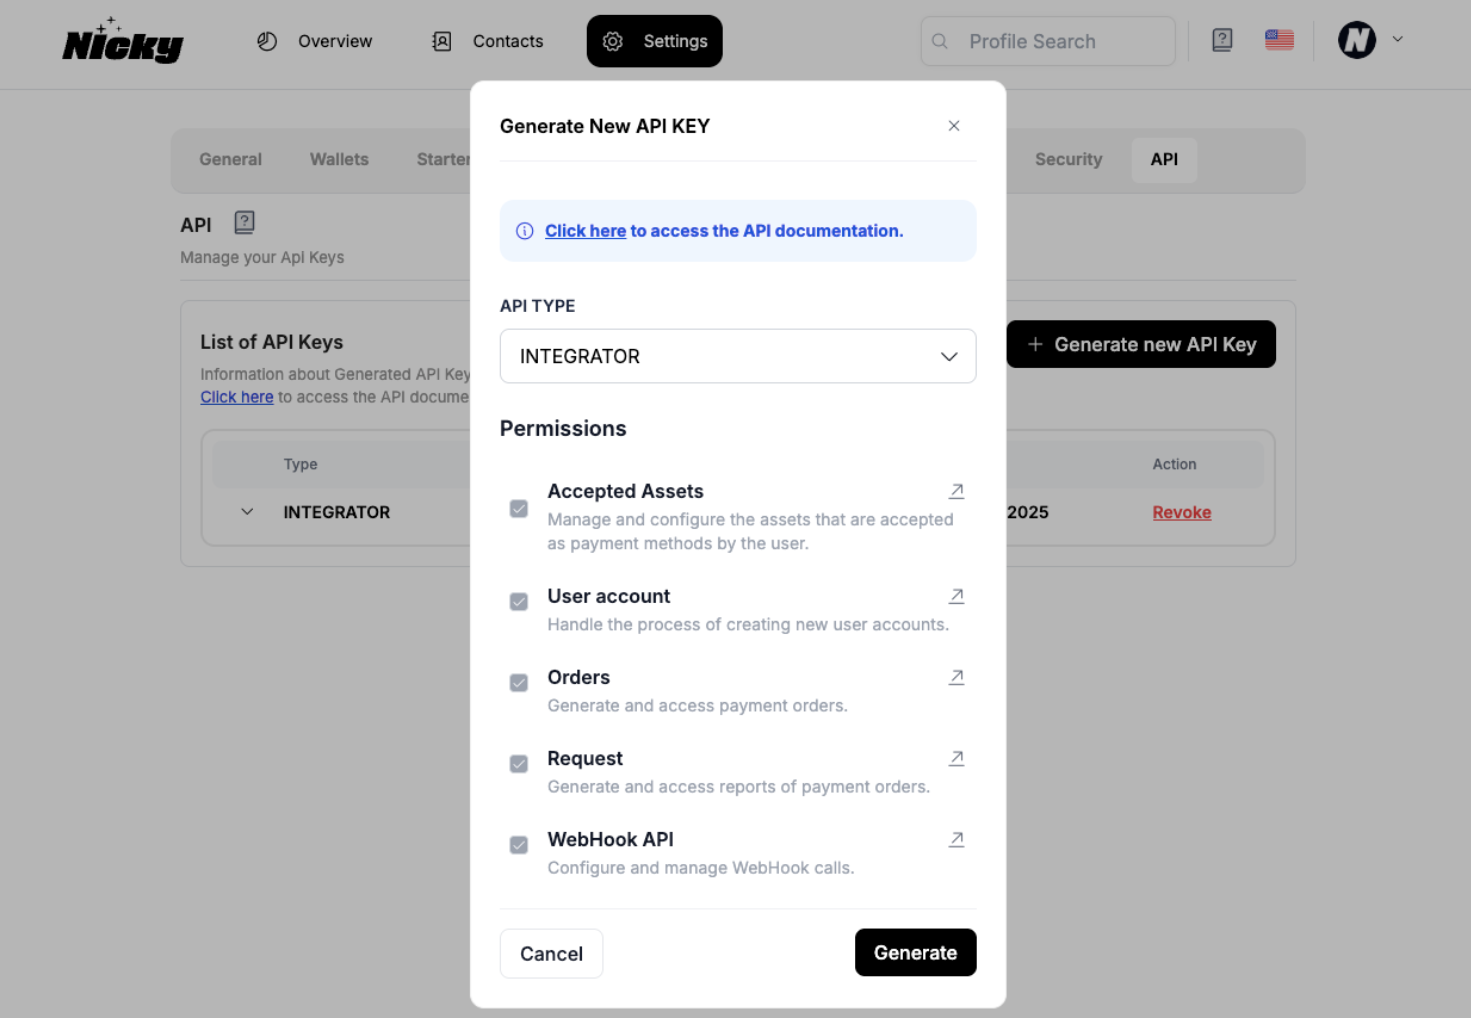
- In the Nicky dashboard, click Settings from the top menu.
- Navigate to API.
- Click “Generate New API Key”.
- Select API TYPE: INTEGRATOR
- Click “Generate”.
- Return to your eCommerce admin panel and paste the API key into the Nicky payment settings, then click “Submit”.
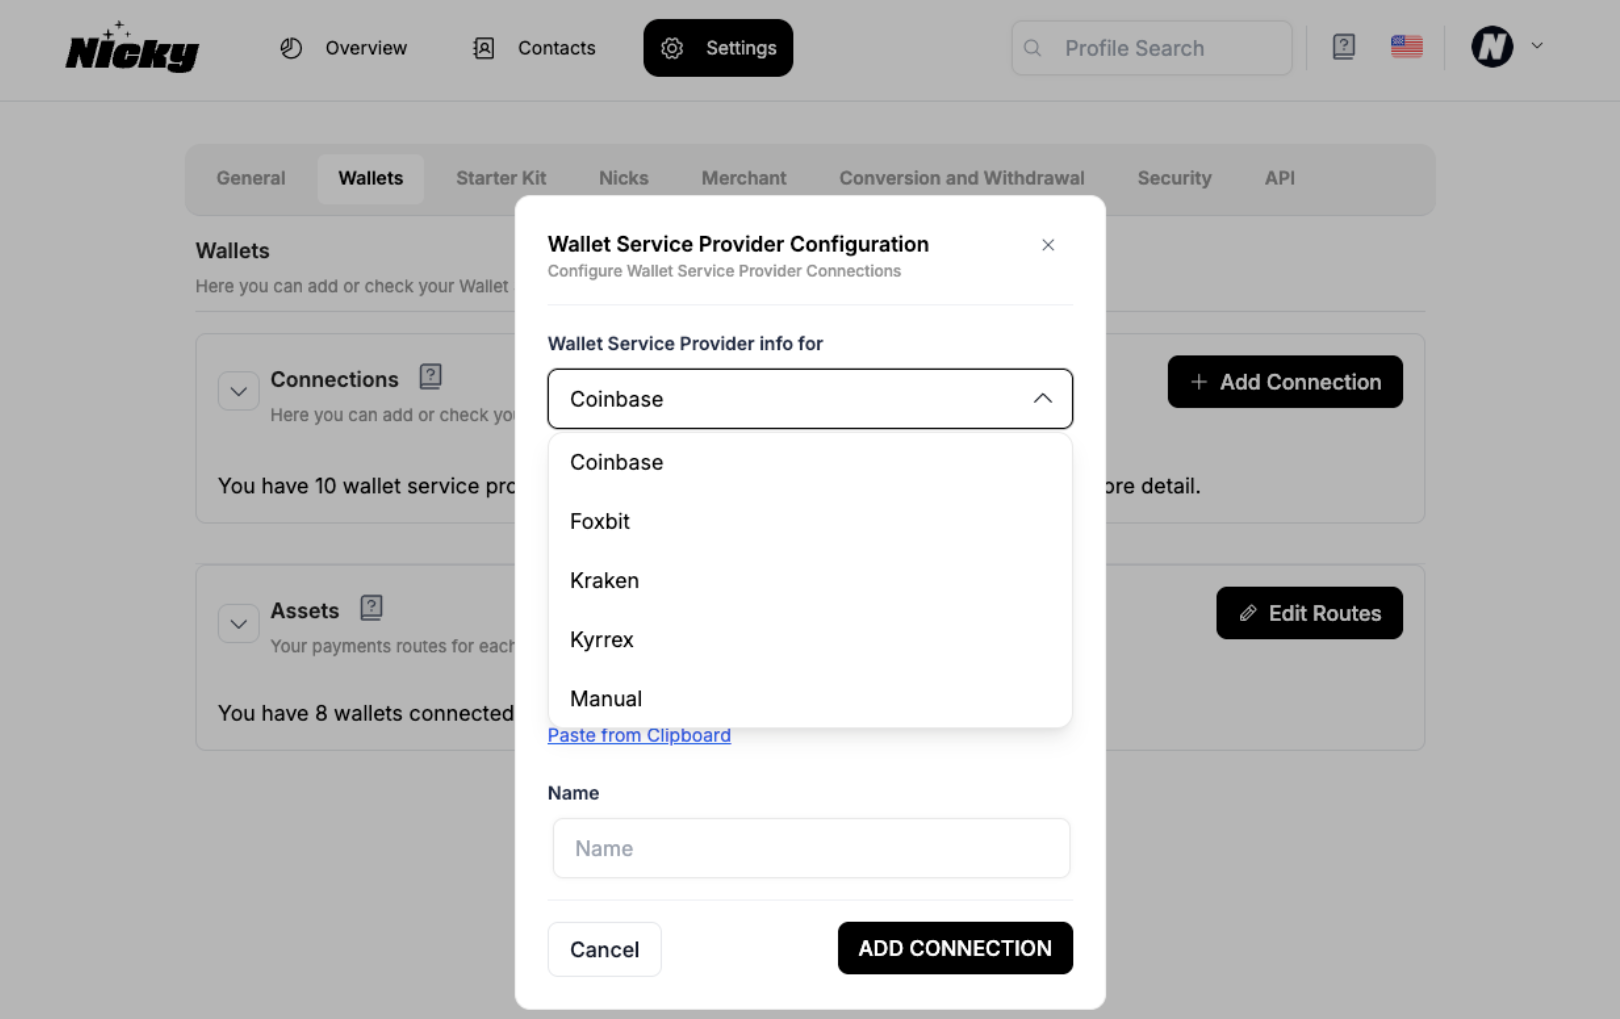
Step 3: Connect your crypto wallet to Nicky
Once your API key is generated, you must connect a wallet or exchange to receive funds.
- Log in to your Nicky dashboard.
- Click “Settings” from the top menu.
- Go to Wallets.
- Click “Add Connection”.
- Manual wallet address (paste your crypto wallet address), or
- Supported crypto exchanges (e.g., Coinbase, Kyrrex) by entering API credentials from the exchange.
- Give the connection a recognizable name.
- Click “Add Connection”.
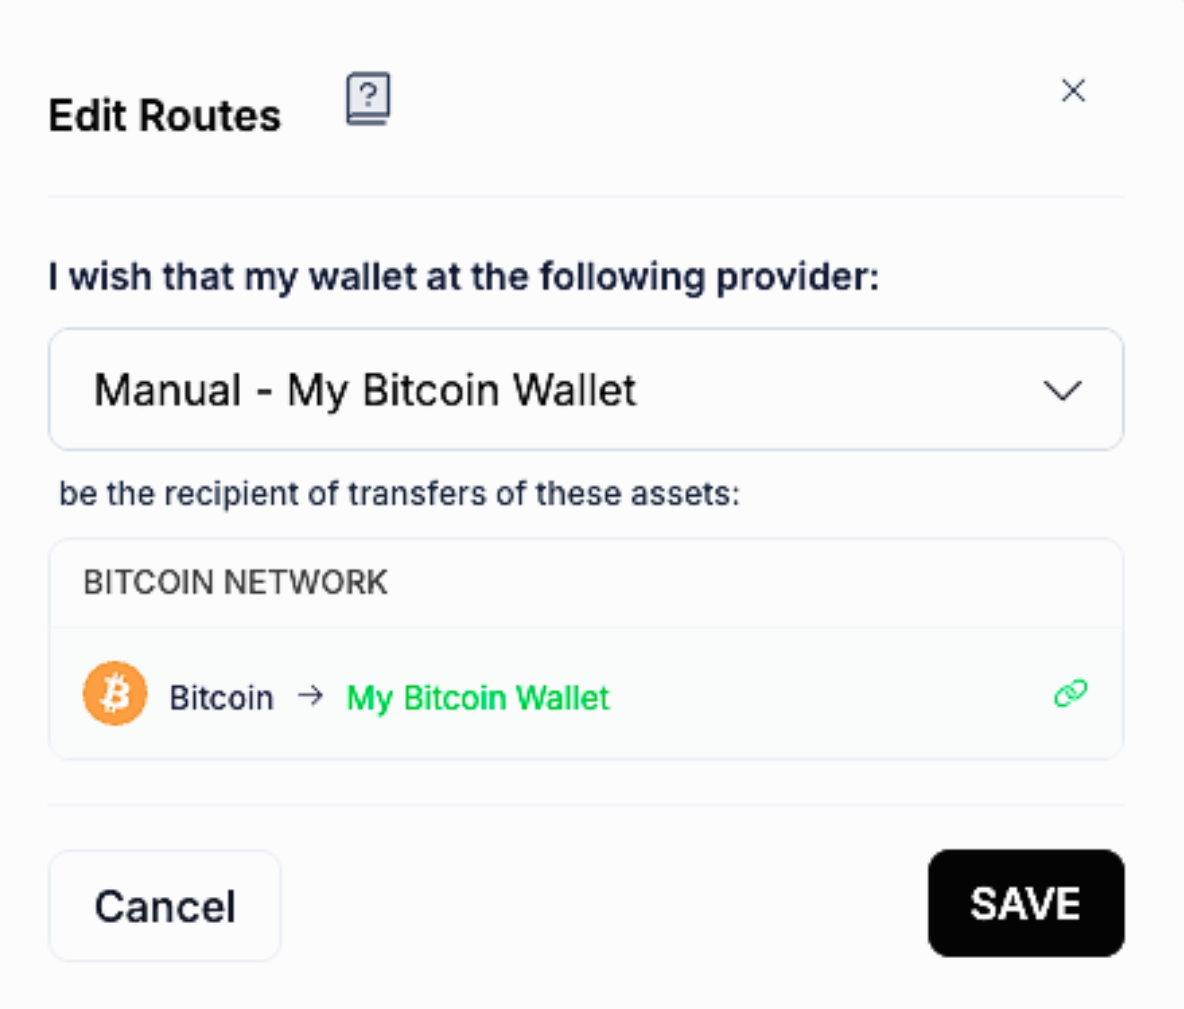
Step 4: Configure routing for supported currencies
Routing defines where each cryptocurrency payment is sent.
- After adding a wallet, click “Set up Now” or “Edit Routes”.
- Select the connected wallet.
- Choose the cryptocurrencies you want to accept (e.g., Bitcoin).
- Click each currency so it turns “green”.
- Click “Save”.
Once routing is configured, your account is ready to accept crypto payments.
Done! your store can now accept crypto payments using Nicky
- Customers can select crypto at checkout.
- Payments are processed securely.
- Funds are routed directly to your connected wallet or exchange.
- Never share your API key publicly. Treat it like a password.
- Before going live, perform a small test payment to confirm.
- Wallet connection
- Routing setup
- Successful transaction flow