
Connecting Google Tag Manager to your eCommerce store
Google Tag Manager (GTM) is a powerful tag-management tool that allows you to add and control all your tracking codes—such as analytics, marketing pixels, and third-party scripts—without manually editing your store’s code.
Your eCommerce platform connects seamlessly with GTM, enabling you to deploy tracking tags, measure user interactions, and gather key performance data with ease.
Benefits of using Google Tag Manager
1. Add and manage tags without coding
GTM lets you install and manage various tags—Google Analytics, Google Ads, Meta Pixel, TikTok Pixel, third-party marketing tags, and custom scripts—without modifying your site’s source code.
2. Track important user interactions
Using GTM triggers, you can track a wide range of events, including:
- Page views
- Button clicks
- Scroll depth
- Add to cart / remove from cart
- Checkout actions
- Purchases
- Custom events
These insights help you understand customer behavior and improve your store’s conversion funnels.
3. Centralized tag management
Instead of adding tracking snippets individually in your store settings, GTM gives you a single platform where you can:
- Add, edit, or disable tags
- Update configurations
- Run A/B tests
- Integrate multiple tools without technical changes
4. Test tags before publishing
GTM’s Preview Mode ensures accurate tracking by allowing you to test all tags and triggers before making them live.
This reduces the risk of:
- Tracking errors
- Duplicate events
- Misconfigured tags
- Data inconsistencies
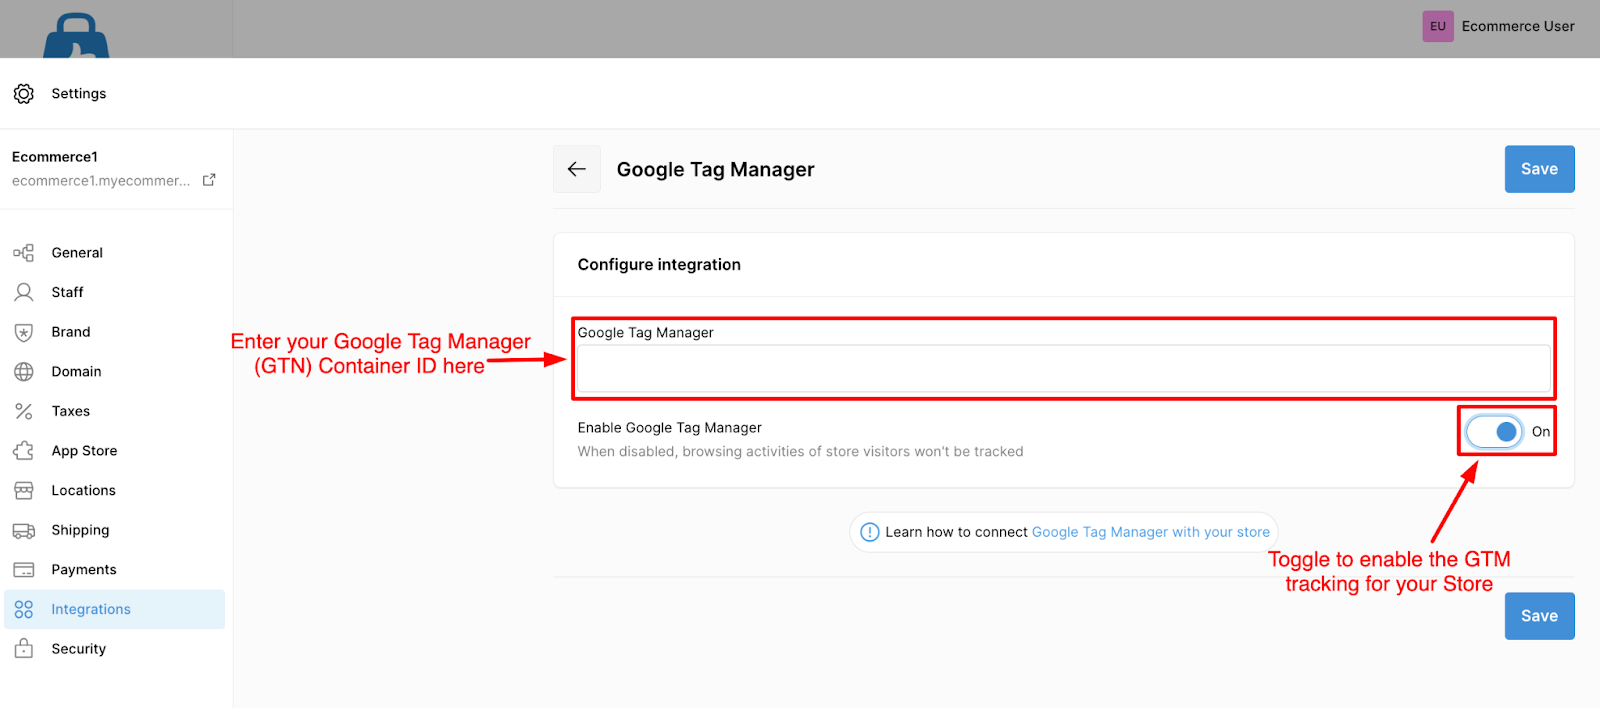
How to connect Google Tag Manager to your eCommerce Store
If you already have a GTM account and container, follow these steps to connect it to your store:
- Log in to your eCommerce admin panel.
- Navigate to Settings → Integrations.
- Click Add next to Google Tag Manager.
- In your GTM account, locate your Container ID (format: GTM-XXXXXX).
- Copy the Container ID and paste it into the input field.
- Click Submit.
Done! Your GTM container is now linked to your eCommerce store. Any tags you publish inside GTM will automatically apply—no additional setup required in your admin panel.
Any tags you publish inside GTM will automatically apply to your store—no additional setup required on your eCommerce admin panel.
How to create a GTM Account and Container
If you don’t have a GTM account yet, follow these steps:
- Sign in with your Google Account or create a new one.
- Navigate to Google Tag Manager.
- Click Create Account.
- Enter your Account Name and select your country.
- Add a Container Name (e.g., your store name).
- Choose Web as the target platform.
- Click Create and accept the Terms of Service.
- Your Container ID (GTM-XXXXXX) will now appear at the top of the dashboard.
This Container ID is what you will use to connect GTM to your eCommerce store.
How to verify that GTM is installed Correctly
You can confirm your GTM setup using either of these methods:
1. GTM Preview Mode
- Open your GTM dashboard and click Preview.
- Enter your store URL to start the debug session.
- You will see all active tags, events, and triggers firing correctly.
2. Tag Assistant (Chrome Extension)
- Install Tag Assistant from the Chrome Web Store.
- Visit your store URL.
- The extension will detect and validate your GTM container.