
Automating manual order fulfilment and live tracking with Shiprocket
Fulfilling orders manually like copying and pasting addresses, calculating package weights, and manually emailing tracking numbers to customers is one of the biggest bottlenecks to scaling an eCommerce business. Furthermore, a lack of automated tracking leads to an increase in “Where is my order?” (WISMO) customer support tickets, draining your team’s time and energy.
By integrating Shiprocket directly into your eCommerce solution, you enable your entire logistics operation on autopilot. The integration automatically syncs order details to your courier dashboard and, most importantly, pushes live tracking updates back to your storefront and your customers. This hands free approach accelerates delivery times, lowers shipping overhead, and provides the transparent, professional customer experience that modern shoppers expect.
Understanding the shipping bridge
The Shiprocket integration operates through a seamless two way data bridge between your storefront admin and your logistics provider. Here is how the mechanics work:
- Secure credential sync: By connecting your account via your Shiprocket email and password, your storefront gains the ability to automatically push new order data (customer address, package weight, and dimensions) directly to your shipping panel without manual entry.
- The tracking webhook loop: A webhook is a real time data messenger. While the credential sync sends data out to Shiprocket, the webhook brings data back into your storefront. When a courier updates a package’s status (e.g., from “Shipped” to “Out for delivery”), Shiprocket uses the webhook URL to instantly update the order status on your platform. This ensures your customers receive live transit milestones automatically.
Configuring automated fulfillment
Establishing this two way logistical bridge requires your Shiprocket account credentials and a quick copy paste step. Follow these instructions to activate the automation:
- Open your admin panel and go to Settings → Integrations.
- Scroll to find the “Shiprocket” card and click the “Setup” button.
- In the configuration panel, input the “Email” and “Password” associated with your active Shiprocket account.
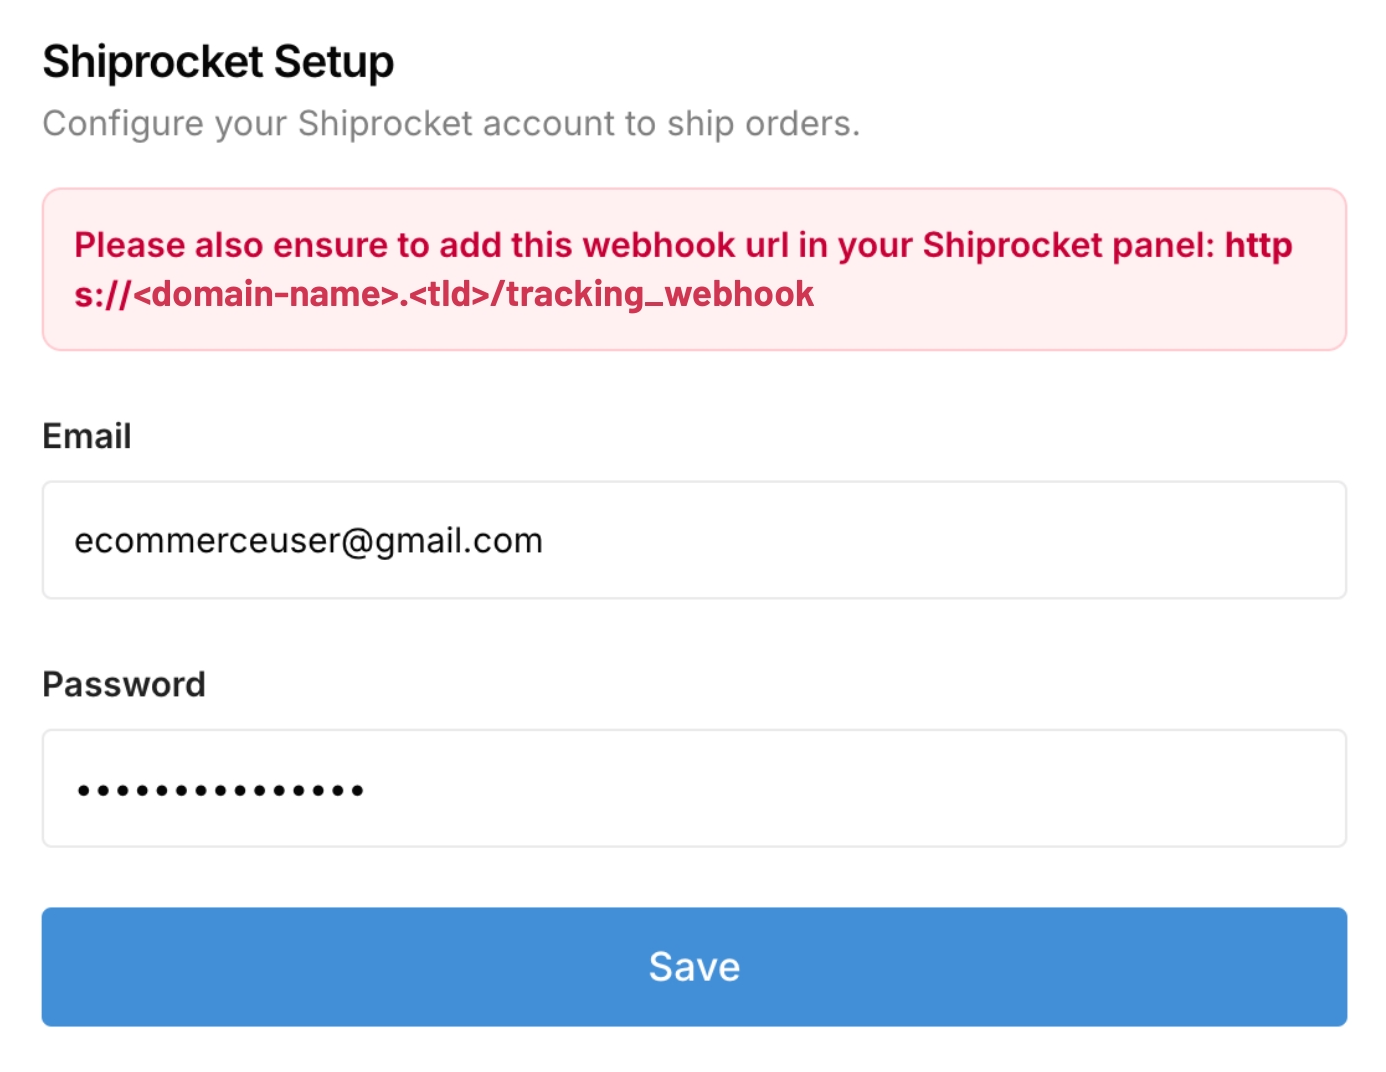
- Configure the webhook loop:
- At the top of the configuration window, locate the red warning box.
- Copy the exact webhook url provided in this box.
- Log into your separate Shiprocket merchant dashboard, navigate to their webhook settings, and paste this URL. This step is mandatory to enable live tracking updates.
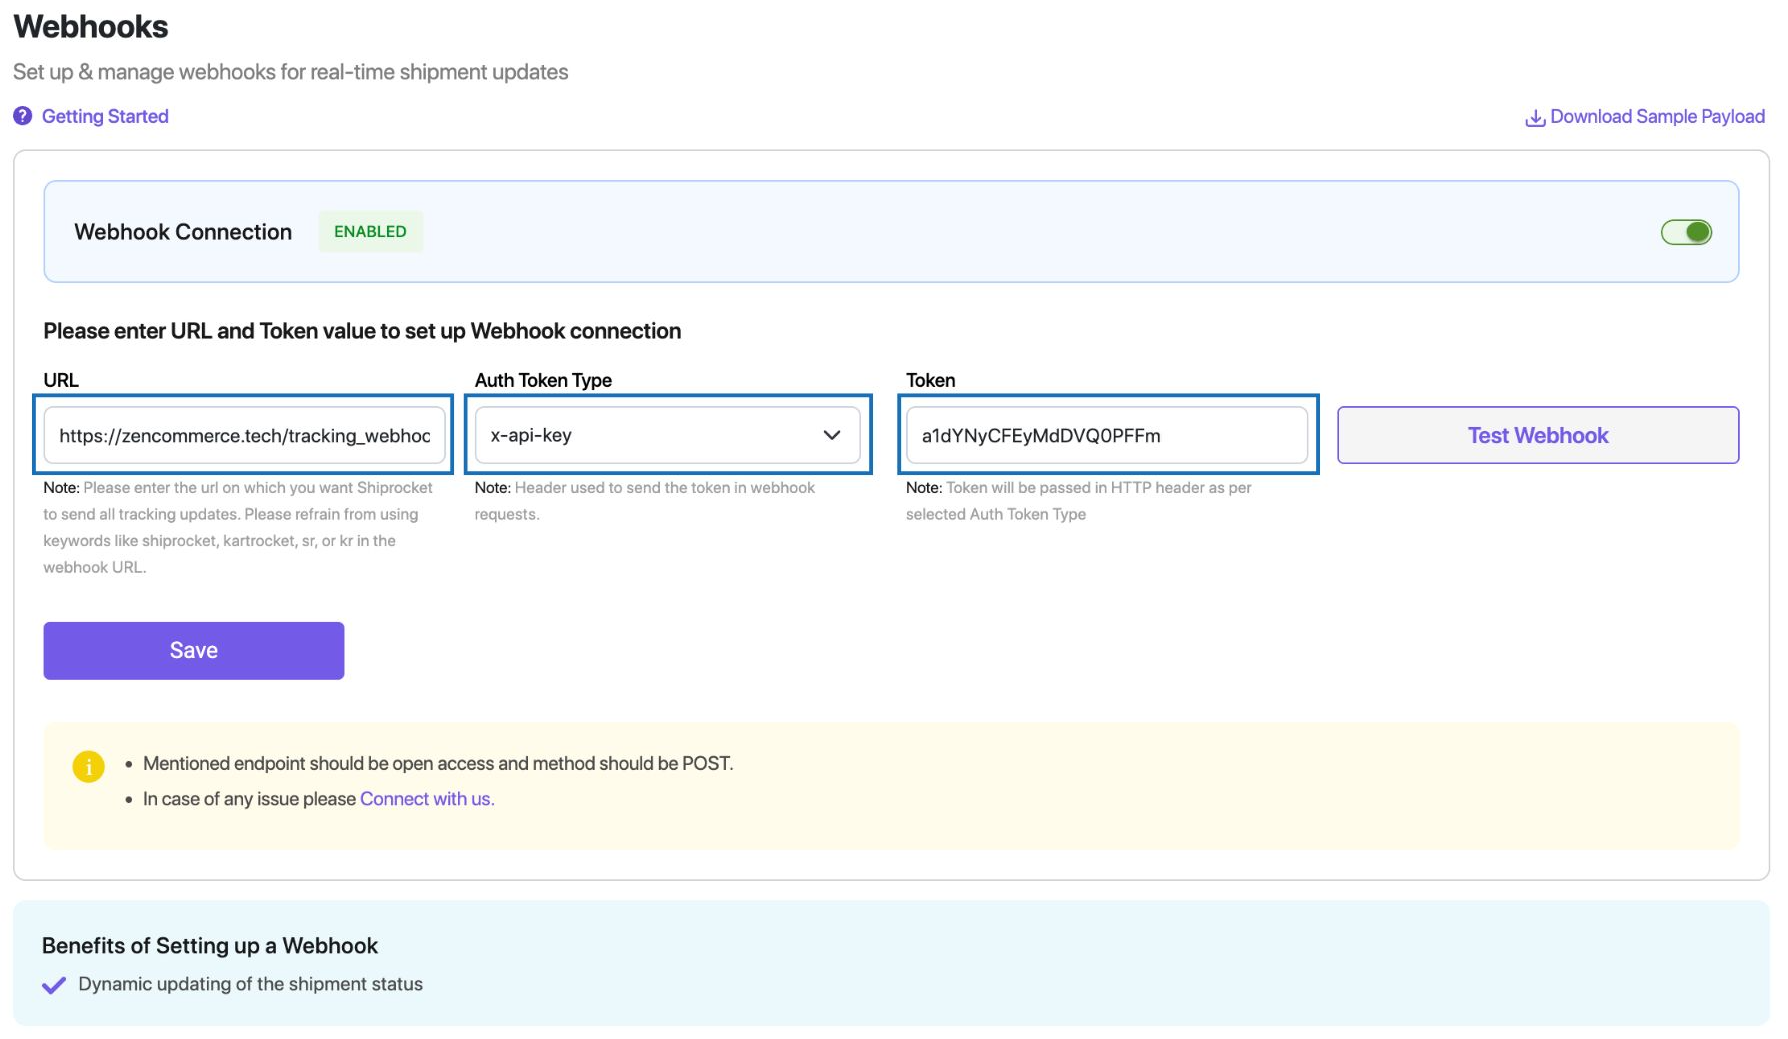
- Return to your storefront admin panel and click the “Save” button at the bottom of the configuration screen to finalize the connection.
Optimizing the delivery experience
Connecting the integration is just the foundation. To truly scale your logistics, implement these operational best practices.
Leverage multiple courier partners
Do not restrict yourself to a single courier. Because the integration automatically routes your orders into Shiprocket, you can utilize their dynamic courier allocation tools. This allows you to automatically route packages to the fastest or most cost effective delivery partner based on the customer’s specific pin code and package weight, protecting your margins on every sale.
Verify your default location pincodes
Automated shipping calculations rely on accurate origin and destination data. Ensure that the default pickup location configured in your storefront admin exactly matches the pickup address and pincode registered in your Shiprocket panel. A mismatch here will cause automated courier assignments and shipping rate calculations to fail.
Let the webhook handle customer communications
Once the webhook loop is configured, trust the system. You no longer need to manually mark orders as shipped or delivered. The system will process these transit milestones automatically, triggering the appropriate tracking notification emails to your customers and keeping them informed at every step of the journey.